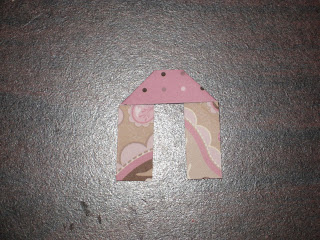
OK, to start out with I would suggest choosing a cardstock that is double sided - that way you've 2 fun, coordinating patterns. Half the work is already done for you! The other thing that I am going to suggest is a really good adhesive - I used Glue Dots brand Glue Lines.
The dimensions (all expressed in inches) for each of the pieces are:
(1) 12 x 4 (for the box part of the backpack)
(1) 4 x 6 1/2 (for the flap of the backpack)
(2) 1 x 8 (for the straps)
(2) 5 x 2 1/4 (for the sides)
(1) 1/2 x 3 1/2 (for the little loop/tab on the top)
Score the 12 x 4 piece of cardstock at 5, 6 and 7 inches. The reason for the score at 6 inches is to make a little gusset at the bottom of the backpack:
After you have scored the body of the backpack, you are going to attach the flap. If you are using double sided paper, remember to flip your flap (NOT like the first picture), so that when you fold it over you will see the other side. I suggest overlapping the pieces about 1 1/4 inches, and having two lines of adhesive - one right on the edge, and the other about 1" in:
From there you are going to start assembling your sides. Score your 5 x 2 1/4 pieces lengthwise at 1/4" and 2" so that you have 1/4" flaps on either side. Apply adhesive to the flaps. Note: This is another spot where you need to pay attention to what side of the paper you want facing out.
Apply the sides to the body of the backpack:
You will notice that the flap in the above picture still has a square edge. If you would like a rounded edge, use your favorite tool, or do what I did and just use a bowl and trace the edge and cut with a good, old fashioned pair of scissors! ;-)
I pinched the sides just a little:
From there you are going to apply your straps. At the top of the straps (the part that would normally sit on your shoulders) you are going to run two strips of adhesive - right on the edge, and about 1/4" in. Apply to the back of the backpack about 1/4" from the sides, and about 1/2" from the top. Then apply 1 strip of adhesive on the other side and on the other end of the flap, and adhere along the bottom edge of the backpack.
To make the little tabby thingy, you will fold the strip at a right angle about 1" from each end:
And then adhere to the back of the backpack between the straps:
From there, embellish as desired!
To keep the flap closed, I used the velcro tabs that already have adhesive on them. Thank you much for your interest in my little backpack. I hope this has helped! If you have any further questions, please feel free to contact me.


7 comments:
Wonderful tutorial and thank you for sharing I will be making one of these for my friends daughter :)
This is so very pretty! What a creative idea!
Great tutorial Andrea, thanks for sharing it....I want to try one of these!!
Great tutorial thanks for sharing.
I think it is so cute I would love to make one of those.
es posible que lo pusieran en español,se los agradecería,esta super.gracias.
Good
Instructions show securing the sides but is the bottom not secured someway or did I not follow instructions properly?
Post a Comment