Showing posts with label decorating. Show all posts

Friday, November 16, 2012

Need a little Christmas?

I am involved with a ladies' organization at my church and I am in charge of our monthly meetings.  The theme for last night's meeting was "A Meaningful Christmas".  It's so easy for this time of year to be stressful and hectic, instead of time of joy and hope.  I wanted to create an atmosphere that was warm and cozy, and I invited people to share ideas for activities and traditions that would help them have a Christ-centered, low-stress Christmas.  At the front of the room I set up a rocking chair, a lamp, and my pretend fireplace/heater.  I had LED pillar candles and lights all over the room, and I brought my Wallflowers (plug-ins) that were Christmasy scented.  This would mean so much more if I had taken a picture!  Christmas music was playing softly in the background as people arrived, and we had a table full of everyone's favorite Christmas treats and recipes to share.

By the glow of the (fake) fire, we started the evening with an inspirational story which was a heart warming reminder of the joy of giving - there wasn't a dry eye in the place!  The rest of the evening was full of wonderful traditions and activities that we can share with our families.  It was a good night, and I came away with some new ideas for inexpensive, meaningful Christmas gifts for my family.

I didn't take a picture of my set-up at the church, but I do have a picture of the wreath that was part of the decorations.


I've been wanting to make this wreath for a while now, but I had a little extra incentive a couple of weeks ago when DCWV put out a call for Utah-based designers.  I live about half an hour from their corporate offices, so I thought why not?  This was one of the projects that I submitted.  The base is a foam wreath that I picked up at Joann, and the rest is paper from DCWV:  from the Recollections Warm Wishes stack, and the DCWV Holiday Collection stack.  Oh, and two cuts with my Silhouette:  the gingerbread man, and the bow.  The rest of the wreath is made of paper accordion flowers, or pinwheels, or whatever you want to call them.

Oh, and I made the team.  Yay!

Tuesday, March 27, 2012

My Pink Stamper Design Team - March

I am so excited to have you join me today for the My Pink Stamper Design Team post.  The theme for this month is Spring is in the Air!  And I am so happy that it actually IS starting to feel like spring.  I love looking out my kitchen window and seeing the blossoms on my fruit trees and the tulips starting to pop out of the ground.  I also love the colors that we were asked to use in this month's assignment - yellow, blue and green.  The stamp set that I am featuring in this month's assignment is Happiest Moments:


Don't you just love daisies?  These accordion flower wreaths are all the rage on Pinterest right now, and I think daisies were the perfect touch.  I used a foam wreath form that I purchased at Joann, and hot glued the accordion flowers and daisies to the wreath.  I was so happy with how this turned out  I put it on my front door - but had to rescue it this morning just as the rain started coming through the screen!  April showers...wait a minute, it's still March!

Cricut Cartridges:  Sweet Treats (daisy), Florals Embellished (butterfly)
Paper:  Provo Craft, DCWV (glitter paper), AC Cardstock
Embellishments:  The Paper Studio (pearls), Hobby Lobby (ribbon)
Tools:  Martha Stewart Scoring Board

Thanks for stopping by today.  If you haven't already, I suggest you head over to My Pink Stamper so you can see all the wonderful Design Team projects.  And of coarse, you can also find out where to purchase My Pink Stamper stamps!

UPDATE :  I've received a few questions regarding how I made my wreath.  I made the accordion flowers in three sizes by cutting strips that were 1 1/2" x 12", 1 1/4" x 12", and 1" x 12".

And this is the type of form that I used as the base.  It's a foam wreath that has squared off edges. The one I used was 10 inches in diameter.

Tuesday, September 20, 2011

My Pink Designer - Spookalicious!

It's that time again!  I am so excited that this month my fellow My Pink Stamper Design Team members and I are featuring one of Robyn's new stamp sets:  Spookalicious!


I LOVE Halloween!  I love the fun of costumes, the nip in the air, and of coarse - the candy!  Don't you just love seeing jars full of brightly colored candies?  It's such a fun and easy way to add a splash of color to your decor.  I picked up this jar at my local craft store and tied some black tulle around the neck in a bow.  Then I got my Mini Monsters cartridge and made the little witch.  For her little trick-or-treating bucket I used the Gypsy so I could hide the contours on the face of the pumpkin.  That way I had a clean slate to use the "Trick or Treat" stamp from Spookalicious.


Stamp:  My Pink Stamper Spookalicious
Cricut Cartridge:  Mini Monsters
Embellishments:  Stickles, Diamond Glaze, Doodlebug Design Boutique Brads, black tulle, white gel pen

Thank you so much for stopping by!  If you haven't already, be sure to head over to My Pink Stamper so you can see all the fun projects from my fellow designers.  If you would like more information on how to purchase your own My Pink Stamper stamps, click here.

Saturday, January 1, 2011

MPS Design Team Challenge

It's that time again - Robyn at My Pink Stamper has put a call out for her next design team.  The challenge:  to make a project using her three favorite colors - pink, green, and brown.  Making this Easter topiary is something that I have wanted to do for months, well, since I first saw the idea.  I have to give credit where credit is due:  I first saw the topiary idea here.  So adorable!  But of coarse I had to tweak it a little to make it my own.


The biggest change I made was I wanted to give the flowers dimension, so after cutting them out I used the tip of my glue pen to form the flower around - kind of easing them into making the petals stick out.  Here is what I used:

  • Small clay pot:  painted with acrylic paint and sealed
  • Foam ball and a foam egg:  these you can get in the floral department at your local craft store.  I got mine at Joann.  The foam ball is hot glued into the base of the pot and you need it there to keep the dowel in place.
  • Wooden dowel
  • Easter grass or paper shred
  • Coordinating paper and ribbon:  The paper I used is called Cherry Cobbler by Doodlebug Design, and the cardstock is from AC Cardstock.  The ribbon is from Michaels.
  • Your choice of critter cut:  The bunny and basket came from Create a Critter
  • Silver brads
  • Hot glue gun
  • Lots and lots of flowers:  These flowers came from the Forever Young cartridge, flower5 set on Shadow.  After cutting the flowers I first punched a 1/16th hole, eased them into a "sticking up" position, placed the brad through the hole, glued the underside of the flower around the brad, then stuck it into the foam.  You could also use corsage pins for this - they would be really pretty!
And now to give a little further credit...

It has been one year since I got my first "baby bug" Cricut for Christmas, which also marks one year as a fan of My Pink Stamper.  I discovered Robyn looking for help with learning how to use my Cricut, and I owe the fact that I learned so quickly and had so much fun along the way to her amazing videos and inspiration.  Thank you!

Monday, December 13, 2010

"Deck the Halls" with a Fantabulous Cricut Crawl!

Welcome to Divine Domesticity and the third Fantabulous Cricut Crawl...Fantabulous Cricut's version of a blog hop!  I'm so glad that you decided to join in the holiday fun with us!

In honor of this joyous season we're having a "Deck the Halls" Crawl in which each Design Team member will be showcasing a Christmas or holiday themed home decor project - all made using a Cricut of coarse!  I'm the first stop on the crawl, and I'm so glad that you have found your way here.

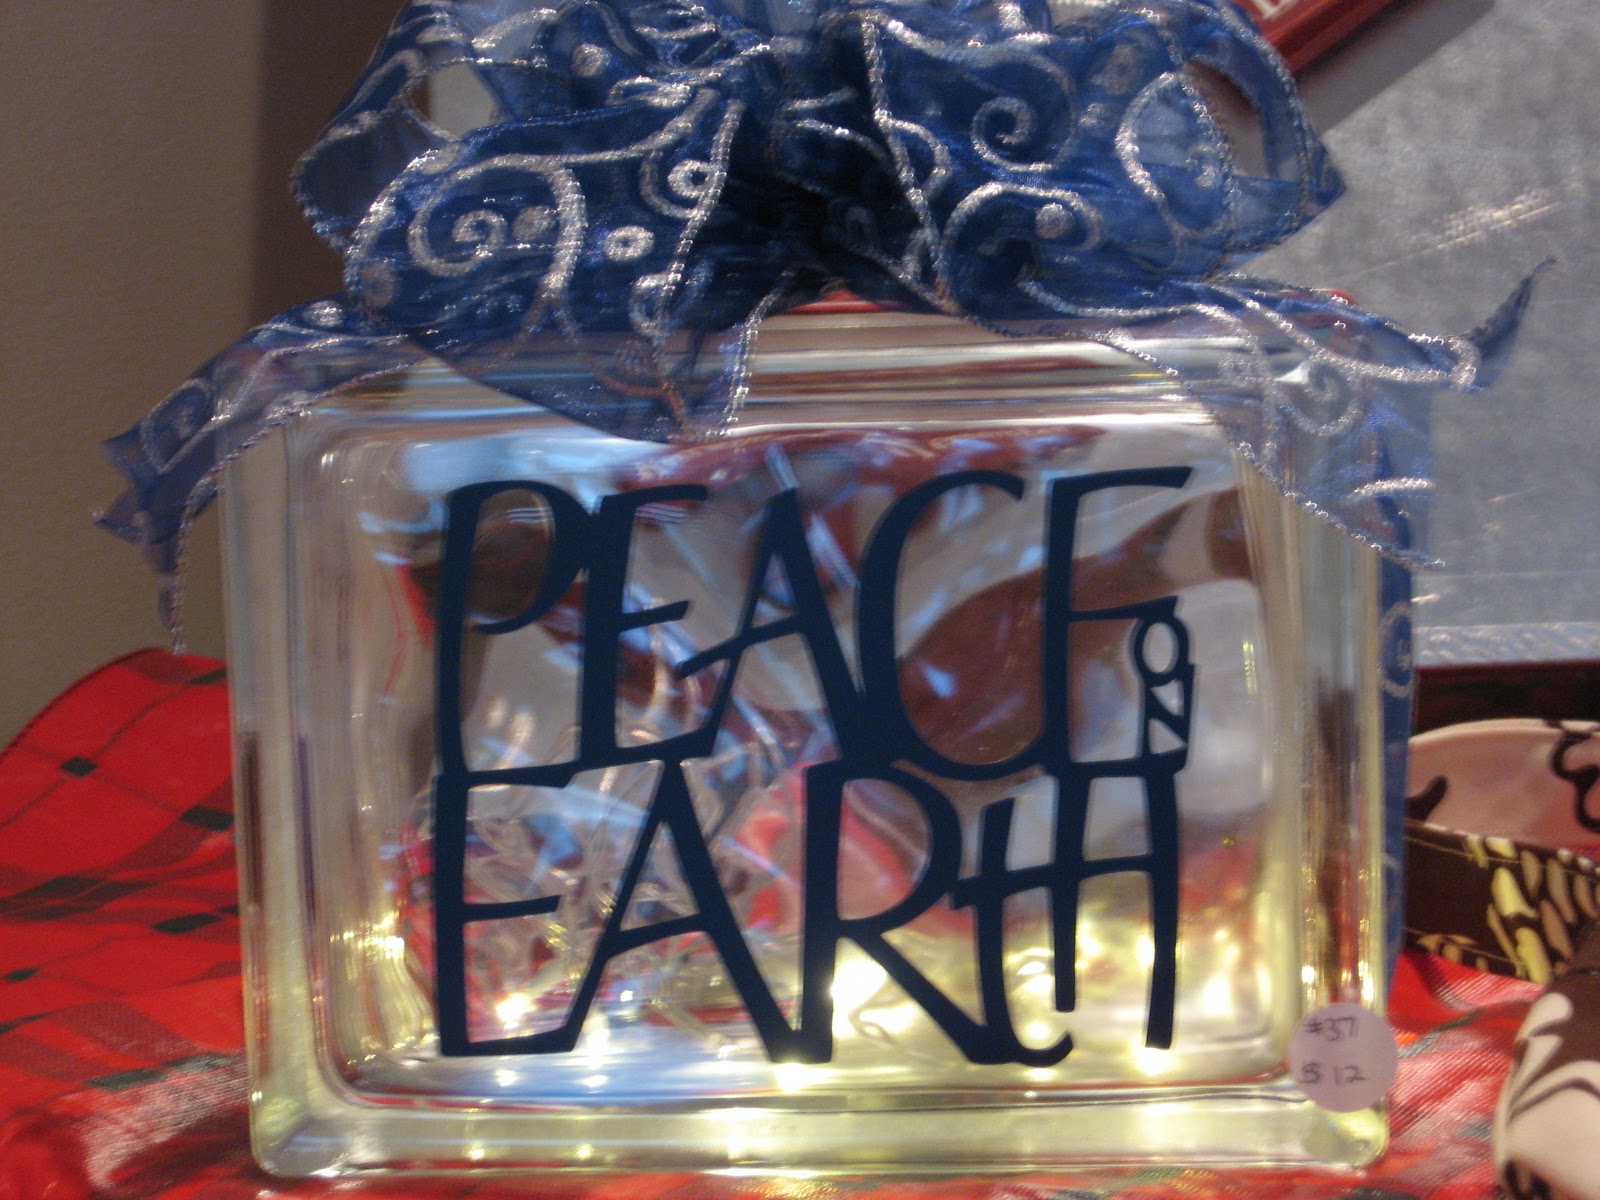
I have been using these glass blocks for about 3-4 years now, but this is the first year that I have been able to decorate one using a Cricut!  I have to say, it's so much easier!  If you are looking for a quick and easy project with maximum "ooohh, aaahhh" factor, this is the project for you.  I made these for a boutique that I participated in recently - hence the price tags.  Incidentally, don't mind the price.  I know, I know - I was practically giving them away.  I was mostly looking to use up some supplies that I had on hand.

I bought these blocks at Home Depot and my husband was good enough to drill the hole in the back so I could put the Christmas lights in.  In order to do that you have to have a diamond tip drill bit, and quite honestly, it's a bit of a pain.  Thankfully, a lot of craft stores sell these blocks with the holes already in them, and some even with slits in them so you can use the blocks as a piggy bank.  Isn't that a good idea?  I might have to try that...


Cricut Cartridge:  Create a Critter (Peace), Beyond Birthdays (Peace on Earth), Winter Frolic (Merry & Bright and Frosty)
Ribbon:  Costco
Battery operated LED lights:  IKEA (go after Christmas and stock up when they're 75% off)
Vinyl:  Roberts Crafts


And now it's your turn.  We would love to see your Christmas/holiday themed home decor projects that you have made using your Cricut.  And when you're done, make sure to link up your project to FCCB's Fantabulous Cricut Crawl post to be entered into the contest!

If you just happened upon my blog today - welcome!  If you would like to join in with the Fantabulous Cricut Crawl, you can here.  Make sure to check out each DT member's blog for some awesome inspiration!  Some DT members will have PRIZES along the way, AND there will be a Grand Prize up for grabs at FCCB for one participant that submits a "Deck The Halls" project at FCCB!

The next step on the crawl is Angela at Simple Creations Paper Crafts!

Monday, October 4, 2010

FCCB Challenge #30 - Baking!

I LOVE to bake!  I was so excited when I saw that this was the theme for this week's challenge at Fantabulous Cricut Challenge Blog.  My first thought was to make something using the Sweet Treats cartridge, which is one of my favorites.  But then I remembered this vase that I was going to make for an upcoming class at Joann.  I was asked to make this to go along with a Wilton Cookie Bouquet class that they will be doing around Christmastime.  I am so happy with how it turned out!  I am really starting to learn the joys of using vinyl - SO EASY!

The peppermint border comes from the Winter Frolic cartridge.


Wednesday, September 1, 2010

Critter Sketch Challenge Blog #29 - Think Fall

My attempt to think "outside of the box" with this challenge has apparently failed spectacularly, because...

My project is IN a box, a shadow box to be exact.

When I saw that the challenge was to "Think Fall" I immediately thought of Halloween.  I love this time of year for the cooler weather it brings, fresh apples, good memories, and of coarse the spookiest holiday of them all!

I made this using the Mini Monsters Cricut cartridge.  The "Happy Halloween" was applied using purple vinyl.

Wednesday, June 30, 2010

God Bless America!

And here is my other project for today.  This was inspired by some totally adorable treat buckets found on this post at Karlee Krafts, and by Robyn at My Pink Stamper that she made a few months ago (that I couldn't find the link to).  I need something to bring to the people that my husband and I visit every month in our church.  I hope they like them!

The buckets come from the ever popular dollar section at Target, and it was so convenient that the Kit Kat, Baby Ruth and 100 Grand were so appropriately colored!  The arrow banner came from the Accent Essentials cartridge, and God Bless America came from Beyond Birthdays.  A word to the wise:  don't cut "america" at 3/4".  It was WAY too fine and it took me forever to get it all put together

And with that, I'll be signing off for today because the domesticity going on at my house right now is far from divine!  Time to do something with the kids so they don't destroy the entire house.

Friday, October 16, 2009

Toilet Paper Pumpkin Tutorial

You need:
  • 1 roll toilet paper
  • orange square of fabric (2ox20 ish. Mine is 22x22 and plenty big)
  • bit of rafia
  • paper lunch sack
  • torn strip of green fabric (roughly 2x8)

lay out your fabric. Mine is so wrinkled because it's been in a pumpkin shape for 2 years. Yours will be flat.


Set your toilet paper in middle. Depending how thick your roll is, is how big your pumpkin will be!

Start with one corner and pleat and stuff in the middle.


Like this! It does not have to be perfect.


Now grab your other things!


stick in your bit of green.


add the always-festive raffia.


cut the end of your paper bag off (sorry, no pic of this) til you get a tube of brown. Scrunch up and fold in half.


Stuff down the middle so it's poking out just so and there you have it! A super quick pumpkin (and emergency stash of toilet paper!)
Happy Fall decorating!


Related Posts Plugin for WordPress, Blogger...